ASP.NET MVC分页和排序功能实现
分页和排序,应该是软件开发中,需要必知必会的技能了,对于分页,网上很多教程,当然,别人终究是别人的,只有自己理解,会了,并且吸收之后,再用自己的语言,传授出来,这才是硬道理。好了,废话说多了。现在我们进入正题:
这里,我打算使用EF Code-First方式分页控件就是用PagedList.MVC,来做分页,对于排序,实现的思路是,加载数据出来之后,默认是升序排序,然后我们点击一下相应的列标题,就按照该字段降序排序,查数据。思路明确了,就开始干吧!
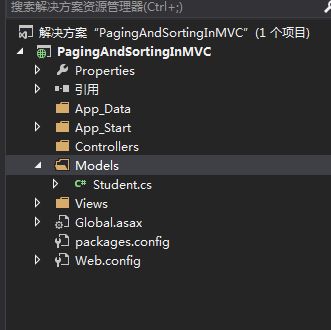
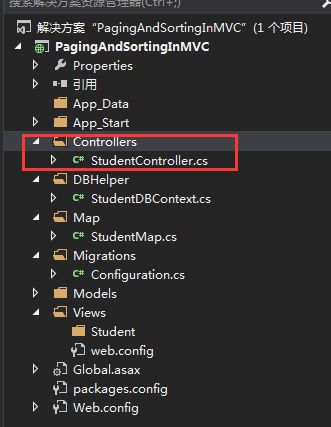
1.首先新建一个空白的MVC项目,在Model文件夹里,新建一个Student实体
Student实体中的代码:
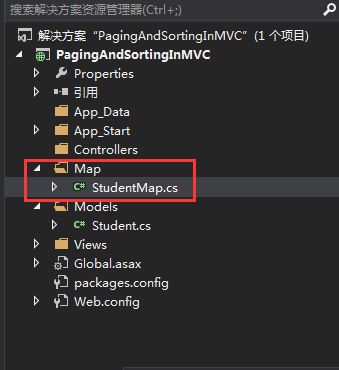
using System; using System.Collections.Generic; using System.Linq; using System.Web; namespace PagingAndSortingInMVC.Models { public class Student { public int ID { get; set; } public string Name { get; set; } public string Sex { get; set; } public string Email { get; set; } public int Age { get; set; } } }2.添加EF引用之后,我们在根目录下,在创建一个文件夹Map,在里面创建一个类StudentMap
StudentMap类的代码:
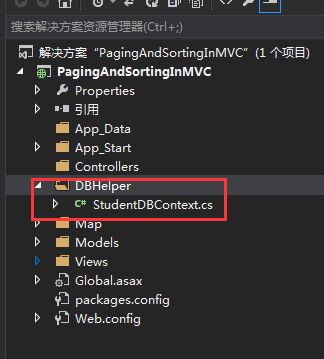
using PagingAndSortingInMVC.Models; using System; using System.Collections.Generic; using System-componentModel.DataAnnotations.Schema; using System.Data.Entity.ModelConfiguration; using System.Linq; using System.Web; namespace PagingAndSortingInMVC.Map { public class StudentMap:EntityTypeConfiguration<Student> { public StudentMap() { //配置主键 this.HasKey(s => s.ID); //把ID列设置为自增列 this.Property(s => s.ID).HasDatabaseGeneratedOption(DatabaseGeneratedOption.Identity); //配置列 this.Property(s => s.Name).HasMaxLength(50).IsRequired(); this.Property(s => s.Sex).HasMaxLength(2).IsRequired(); this.Property(s => s.Age).IsRequired(); this.Property(s => s.Email).HasMaxLength(100).IsRequired(); } } }3.在根目录下,再新建一个文件夹DBHelper,在里面新建一个类StudentDBContext
StudentDBContext类的代码:
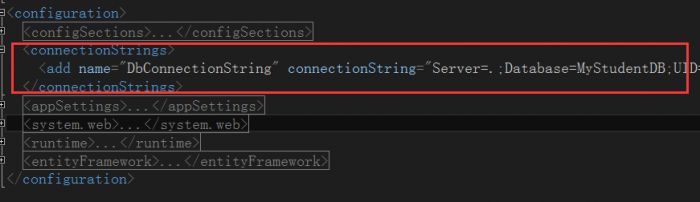
using PagingAndSortingInMVC.Map; using System; using System.Collections.Generic; using System.Data.Entity; using System.Linq; using System.Web; namespace PagingAndSortingInMVC.DBHelper { public class StudentDBContext:DbContext { public StudentDBContext() : base("name=DbConnectionString") { } protected override void OnModelCreating(DbModelBuilder modelBuilder) { //因为这里只有一个实体,就不搞的那么复杂了,不用反射来做。直接添加单个实体的配置 modelBuilder.Configurations.Add(new StudentMap()); base.OnModelCreating(modelBuilder); } } }然后在配置文件中加上:
具体的位置在这:
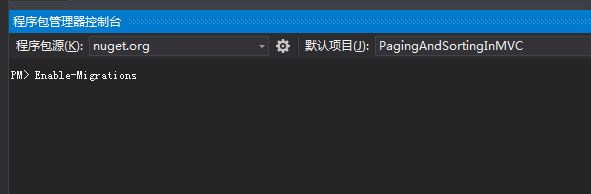
4.好了,现在实体和数据库的配置都写好了,现在我们使用数据库迁移技术【Migrations】来自动生成数据库,首先打开程序包管理控制台。
添加一行语句:Enable-Migrations,然后按回车键:
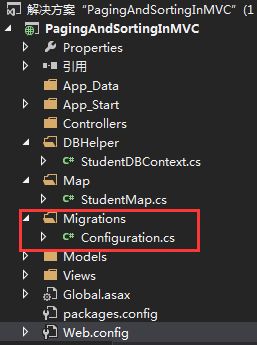
这个时候,就在我们程序中生成了一个文件夹Migrations,里面有一个类Configuration:
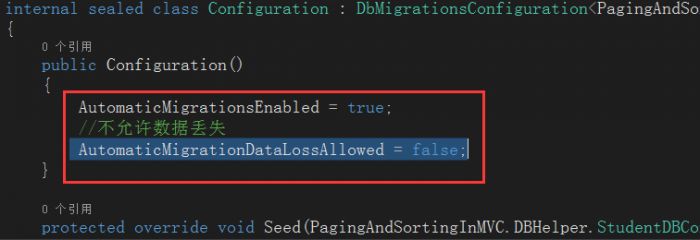
修改Configuration类中的代码:把 AutomaticMigrationsEnabled 设置为true;并添加一句代码,让迁移过程中,没有数据丢失:
AutomaticMigrationDataLossAllowed = false;
然后在程序包管理控制台中接着输入:
Update-Database -Verbose
注意: 【-Verbose和Database之间有空格】,之所以输入-Verbose就是可以在控制台看到生成的SQL语句:
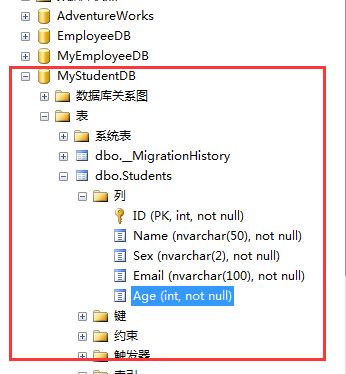
PM> Update-Database -Verbose Using StartUp project 'PagingAndSortingInMVC'. Using NuGet project 'PagingAndSortingInMVC'. Specify the '-Verbose' flag to view the SQL statements being applied to the target database. Target database is: 'MyStudentDB' (DataSource: ., Provider: System.Data.SqlClient, Origin: Configuration). No pending explicit migrations. Applying automatic migration: 201607180249098_AutomaticMigration. CREATE TABLE [dbo].[Students] ( [ID] [int] NOT NULL IDENTITY, [Name] [nvarchar](50) NOT NULL, [Sex] [nvarchar](2) NOT NULL, [Email] [nvarchar](100) NOT NULL, [Age] [int] NOT NULL, CONSTRAINT [PK_dbo.Students] PRIMARY KEY ([ID]) ) CREATE TABLE [dbo].[__MigrationHistory] ( [MigrationId] [nvarchar](150) NOT NULL, [ContextKey] [nvarchar](300) NOT NULL, [Model] [varbinary](max) NOT NULL, [ProductVersion] [nvarchar](32) NOT NULL, CONSTRAINT [PK_dbo.__MigrationHistory] PRIMARY KEY ([MigrationId], [ContextKey]) ) INSERT [dbo].[__MigrationHistory]([MigrationId], [ContextKey], [Model], [ProductVersion]) VALUES (N'201607180249098_AutomaticMigration', N'PagingAndSortingInMVC.Migrations.Configuration', 0x1F8B0800000000000400CD57DB6EDB38107D5FA0FF20F03935ED040B7403B9856327BBC6D64950A579A7A5B1422C456A492AB0BFAD0FFB49FB0B3BD4DD926F31DA451120B0A8993333673817FDFBED1FFFD33A11DE2B68C3951C93D160483C90A18AB88CC724B3ABF71FC8A78FEF7EF16FA364ED3D5772574E0E35A51993176BD36B4A4DF80209338384875A19B5B283502594458A5E0E87BFD1D188024210C4F23CFF4B262D4F207FC0C7A99221A4366362A12210A63CC737418EEADDB3044CCA4218934716A36F1319054A5BFC35978BE7E96076F307881434F1268233F42A00B1221E93525966D1E7EBAF0602AB958C83140F9878DAA480722B260C94B15C37E2A78635BC7461D146B1820A336355F246C0D155C913EDAA9FC536A97944266F9171BB7151E76C2243368B405AE2756D5D4F857672FBB82E723428F52FBC9D5217F565C13BE5FE2EBC69266CA6612C21B39A0954CC9682877FC2E649FD05722C3321DA2EA3D3F86EEB008F1EB5C23CDBCD17589581CC67C4A3DB7AB4AB58ABB5748A18E7D25E5D12EF1E8DB3A580FA46B4F808ACD2F03B48D0CC42F4C8AC058D099DBBF091D39EF58E2DF7BFB28657101922DE82AD3F838CEDCB98FC8AA574C7D7105507A5035F25C73A441DAB33D8E1E061A301AC0FD8BCFC11266F13C6C501A3A3E10F897412C3B15CB6017CDA5442BF3EB01359C631D3DB4532BB712F60BDAB5AB0B1940563CA08B6DD2D8003B0DB9086788D2345BF1AD425B9CBE1DAB5A63BD2A23D566D94EEE9A3FE82A52966A3D557CB132F289AEAF47DF0F60E93141834343B1A4DED6D6D098B88C5D0798BA6D1D33BAE8D9D31CB96CCA56B1A253DB15E22F6905C99EB70DDED220DF59582FB5D281D9E3075923A900DA9771867821279C8507BD674DC9E663EE898607A47979A2A9125725FA73BA45DF49DB67E71723A42DE44DA00F9C1E9FA654768239447A763E4E5DD46C80FFAFA3EEDD0DF4D39EDE5BC3333BA77E8500D76456AEB752D766ACE2FEFFFF105A757108508F19098571EE5C5B0311692811318047F8BA9E079D7A804164CF215185B8C5582F5FAA1B317FD3C3B0A352612A72D2AFFFB6AC01DA94787FF1BC7557B1B90AF4C872F4CF7F681F387FD4EC86333F1C82CDF89994FF3F34775CEED771CD4FD3172D2143E34848BBA1B9368A9D0EBC2CF66789F39A2FB6DC0A7EDAF217F0686C70D84FB369210BAFA6A402B99B95CA98A620CADED5125D2C9C0022C8B90A1094EB6150B2DBE0EC1987C557B6622CB53BF84682E1F329B6676620C244BB1B5E3FAF4B0FD7C0FD9F6D97F48DD93F91E21A09B1C43800779937111D57EDFEDB8427B20DC65294B1ABDC25515E1E24D8D74AFE48940257D334841BA7BF104492A10CC3CC880BDC239BEE13AF91962166EAA6EBE1FE47822B669F7679CC59A25A6C468F4DD173E759FF81FFF0366E046F514100000 , N'6.1.3-40302') Running Seed method. PM>打开数据库,我们看到,就生成我们想要的数据库和表了:
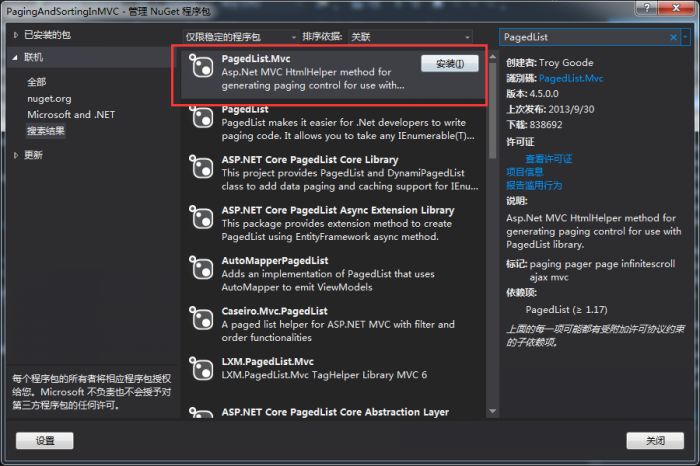
既然要分页,就开始引入分页控件吧,引入PagedList.MVC
5.新建一个空白模板的Student控制器。
控制器里面就是我们主要的逻辑代码了:
创建相对应的Index视图和AddStudent视图:
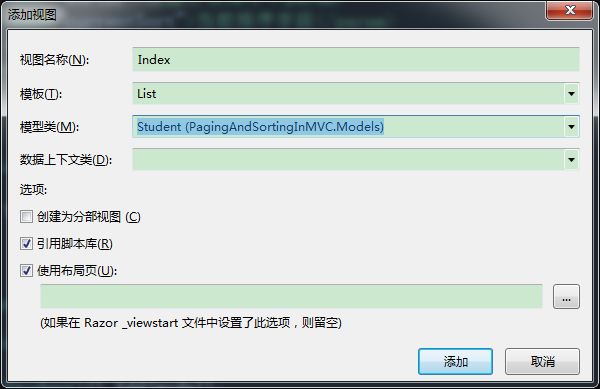
Index视图:
@using PagedList.Mvc;@*//引入分页的组件*@ @model PagedList.IPagedList<PagingAndSortingInMVC.Models.Student> @{ ViewBag.Title = "Index"; } <style> table { width: 100%; } table tr td { border: 2px solid black; text-align: center; word-wrap: break-word; } table tr:hover { background-color: #000; color: #fff; } table tr th { border: 2px solid black; text-align: center; background-color: #fff; color: #000; } </style> <h2>Index</h2> <p> @Html.ActionLink("Create New", "Create") </p> @using(Html.BeginForm("Index","Employee",FormMethod.Get)) { <table class="table"> <tr> <th> @* 通过创建匿名对象,传递参数到控制器中,new { sortBy = "Name", currentSort = ViewBag.CurrentSort }*@ @*参数的大小写无所谓,只要和控制器名称一样就行,sortBy,currentSort*@ @Html.ActionLink("Name", "Index", new { sortBy = "Name", currentSort = ViewBag.CurrentSort }) </th> <th> @Html.ActionLink("Sex", "Index", new { sortBy = "Sex", currentSort = ViewBag.CurrentSort }) </th> <th> @Html.ActionLink("Email", "Index", new { sortBy = "Email", currentSort = ViewBag.CurrentSort }) </th> <th> @Html.ActionLink("Age", "Index", new {sortBy = "Age", currentSort = ViewBag.CurrentSort }) </th> <th></th> </tr> @foreach (var item in Model) { <tr> <td> @Html.DisplayFor(modelItem => item.Name) </td> <td> @Html.DisplayFor(modelItem => item.Sex) </td> <td> @Html.DisplayFor(modelItem => item.Email) </td> <td> @Html.DisplayFor(modelItem => item.Age) </td> <td> </td> </tr> } </table> } <div style="text-align:center"> @*总页数是否小于当前页,小于就说明没数据,赋值0,否则赋值PageNumber*@ Page @(Model.PageCount< Model.PageNumber?0:Model.PageNumber) of @Model.PageCount @Html.PagedListPager(Model, page => Url.Action("Index", new { page}),PagedListRenderOptions.Classic) </div>AddStudent视图:
@model PagingAndSortingInMVC.Models.Student @{ ViewBag.Title = "AddStudent"; } <h2>AddStudent</h2> @using (Html.BeginForm()) { @Html.AntiForgeryToken() <div class="form-horizontal"> <h4>Student</h4> <hr /> @Html.ValidationSummary(true, "", new { @class = "text-danger" }) <div class="form-group"> @Html-l abelFor(model => model.Name, htmlAttributes: new { @class = "control-label col-md-2" }) <div class="col-md-10"> @Html.EditorFor(model => model.Name, new { htmlAttributes = new { @class = "form-control" } }) @Html.ValidationMessageFor(model => model.Name, "", new { @class = "text-danger" }) </div> </div> <div class="form-group"> @Html-l abelFor(model => model.Sex, htmlAttributes: new { @class = "control-label col-md-2" }) <div class="col-md-10"> @Html.EditorFor(model => model.Sex, new { htmlAttributes = new { @class = "form-control" } }) @Html.ValidationMessageFor(model => model.Sex, "", new { @class = "text-danger" }) </div> </div> <div class="form-group"> @Html-l abelFor(model => model.Email, htmlAttributes: new { @class = "control-label col-md-2" }) <div class="col-md-10"> @Html.EditorFor(model => model.Email, new { htmlAttributes = new { @class = "form-control" } }) @Html.ValidationMessageFor(model => model.Email, "", new { @class = "text-danger" }) </div> </div> <div class="form-group"> @Html-l abelFor(model => model.Age, htmlAttributes: new { @class = "control-label col-md-2" }) <div class="col-md-10"> @Html.EditorFor(model => model.Age, new { htmlAttributes = new { @class = "form-control" } }) @Html.ValidationMessageFor(model => model.Age, "", new { @class = "text-danger" }) </div> </div> <div class="form-group"> <div class="col-md-offset-2 col-md-10"> <input type="submit" value="Create" class="btn btn-default" /> </div> </div> </div> } <div> @Html.ActionLink("Back to List", "Index") </div> <script src="~/Scripts/jquery-1.10.2.min.js"></script> <script src="~/Scripts/jquery.validate.min.js"></script> <script src="~/Scripts/jquery.validate.unobtrusive.min.js"></script>接着修改一下布局页:
<!DOCTYPE html> <html> <head> <meta charset="utf-8" /> <meta name="viewport" content="width=device-width, initial-scale=1.0"> <title>@ViewBag.Title - My ASP Application</title> <link href="~/Content/Site.css" rel="stylesheet" type="text/css" /> <link href="~/Content/bootstrap.min.css" rel="stylesheet" type="text/css" /> <script src="~/Scripts/modernizr-2.6.2.js"></script> </head> <body> <div class="navbar navbar-inverse navbar-fixed-top"> <div class="container"> <div class="navbar-header"> <button type="button" class="navbar-toggle" data-toggle="collapse" data-target=".navbar-collapse"> <span class="icon-bar"></span> <span class="icon-bar"></span> <span class="icon-bar"></span> </button> @Html.ActionLink("Application name", "Index", "Home", new { area = "" }, new { @class = "navbar-brand" }) </div> <div class="navbar-collapse collapse"> <ul class="nav navbar-nav"> @Html.ActionLink("Student List","Index") @Html.ActionLink("Add Student ", "AddStudent") </ul> </div> </div> </div> <div class="container body-content"> @RenderBody() <hr /> <footer> <p>© @DateTime.Now.Year - My ASP Application</p> </footer> </div> <script src="~/Scripts/jquery-1.10.2.min.js"></script> <script src="~/Scripts/bootstrap.min.js"></script> </body> </html>修改一下默认路由:
using System; using System.Collections.Generic; using System.Linq; using System.Web; using System.Web.Mvc; using System.Web.Routing; namespace PagingAndSortingInMVC { public class RouteConfig { public static void RegisterRoutes(RouteCollection routes) { routes.IgnoreRoute("{resource}.axd/{*pathInfo}"); routes.MapRoute( name: "Default", url: "{controller}/{action}/{id}", defaults: new { controller = "Student", action = "Index", id = UrlParameter.Optional } ); } } }运行项目:
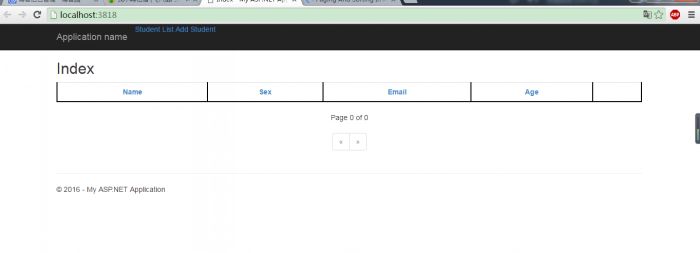
刚开始没有任何数据,我们添加几条测试数据:

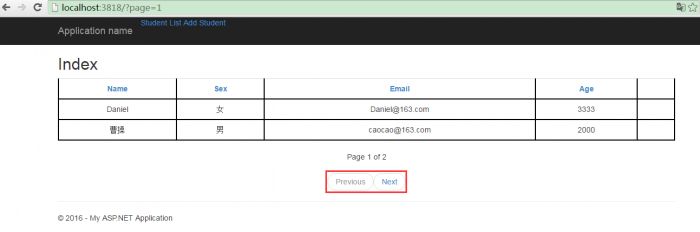
我们来验证一下,结果:

看到了么,点击相应的列标题就可以进行排序了。分页也实现了。当然分页的样式可以通过改变这个选项:
@Html.PagedListPager(Model, page => Url.Action("Index", new { page}),PagedListRenderOptions.Classic)
这里,我修改了一下
@Html.PagedListPager(Model, page => Url.Action("Index", new { page}),PagedListRenderOptions.TwitterBootstrapPager)
分页控件的效果就是这样了。
好了,这篇文章到此结束。
总结:分页和排序是很重要的功能,需要熟练掌握。
以上就是本文的全部内容,希望对大家的学习有所帮助,也希望大家多多支持。
《ASP.NET MVC分页和排序功能实现》阅读地址:http://www.haoshilao.net/12724/
已有0条评论,点击查看发表评论